Showing posts with label Interior. Show all posts

Friday, February 10, 2012

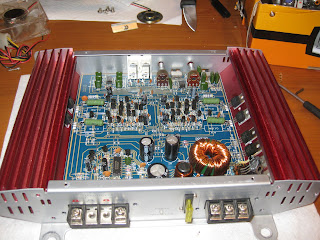
Amplifier case for carputer

I've read some forums where people have been using amplifier cases for their computers as cheap cases. I decided to give it a try and see if I can do the same.

The sacraficed amp!

Zotac NM10 ITX A-E


Soo many screws :)


A few shots of the amp disassembly.


And it fits... sort of. The board is about 1cm wider than the original amp board so I am not able to mount it directly to the metal plate on the bottom like i wanted to, but I think it will still work. I put the board in upside down and tested the clearances and everything should be good. I'm going to do some more work on it this weekend to see if I can get it completed and ready to be bolted in under the drivers seat.

I have a small fan that I will try to mount to get some sort of circulation and will watch the temperatures when I first fire it up to make sure it's not going to overheat. Might even throw it in the oven at 100 degrees to test for those nice warm sunny days. Of course I would never drive my car without AC on those days, but when you first get in after a long day of baking in sunlight things can get pretty warm for a while.


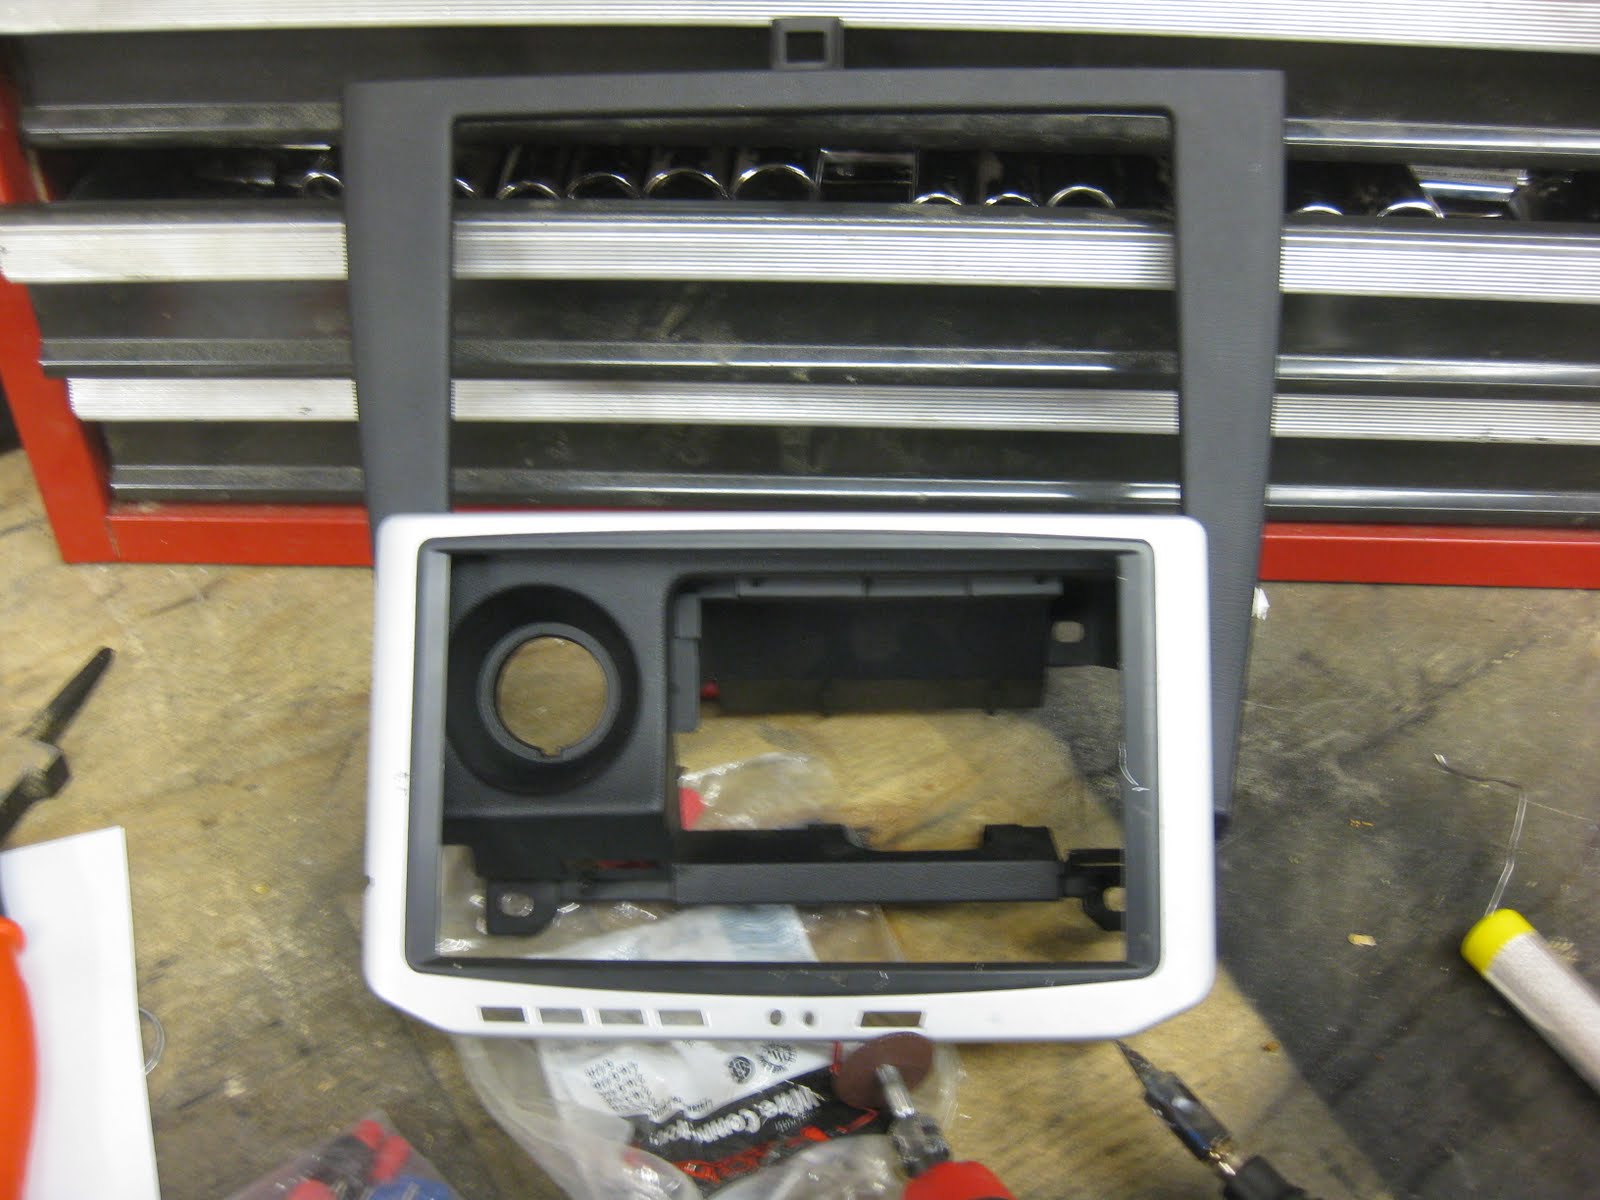
Let the dremeling commence!

I've been all over the forums and have read many users threads that mention using a dremel to cut into their dash components and using body filler to smooth everything out and the end result usually always comes out looking virtually stock.
Since I've never attempted anything similar myself I've been putting it off.
Well, yesterday I came across a user on mp3car.com named Tom_rosenback whom inspired me to start cutting into my radio bezel.
In his thread you can see where he had cut out the shape of his monitor into the bezel and was able to fill everything, sand, and paint. In my eyes, the end result is pretty amazing and I love the complete stock look of it.
With that in mind, as soon as I got off of work last night, I pulled out my old monitor set up out and started tracing. Originally I wanted to know a guestimate of what the bevel on the monitor case would look like and how much room it would take up. The following is a picture of the tracings.

In order to trace everything I had to put them face down, so this image is flipped horizontally. You can see the open space for the ashtray on the left hand side. Also the screen is smaller than the opening of the stock bezel which is the middle square drawn it. Therefore I will need to use the monitor case to keep the stock beveled look.


The following should give you an idea as to how the screen fits in with the case and stereo bezel.


Stock stereo bezel

And a picture with the monitor case

This is my first time using a dremel so I started out slow and only took a little bit off at a time. After about an hour of work i was able to get the front piece of the monitor case to fit around the stock screw holes for the bezel. My goal is to keep all stock mounting and bolting points working so when it came time to install, there was no special fabrication I would need to do.

Also, I was ble to keep all the original screw points in the screen cover so when I put the screen and circuit board back in, everything would bolt up normally.

A picture from the front.

I found that while everything fit pretty well, I was left with a pretty decent drop off from the front of the bezel to the front of the screen cover. After viewing Tom_rosenback's thread again I realized that if I wanted a stock appearance, I would need to cut more out and make everything fit at the same depth.

I started by cutting off the top piece. The cover was at the perfect height to match up with the top of the bezel.

With more cutting on the sides and some sanding on the bottom I was finally able to get the screen to fit in smoothly and match up with everything.
One regret is at the top of the screen cover, I had cut in two slits to clear the top of the bezel. Now they won't be needed anymore and I'll have to add some filler in there.


I added the back cover to the screen case and tested the fitment of everything.

I figured it looked good on the bench but I needed to see it in the car to see how everything lined up.

Passed my initial inspection. :)

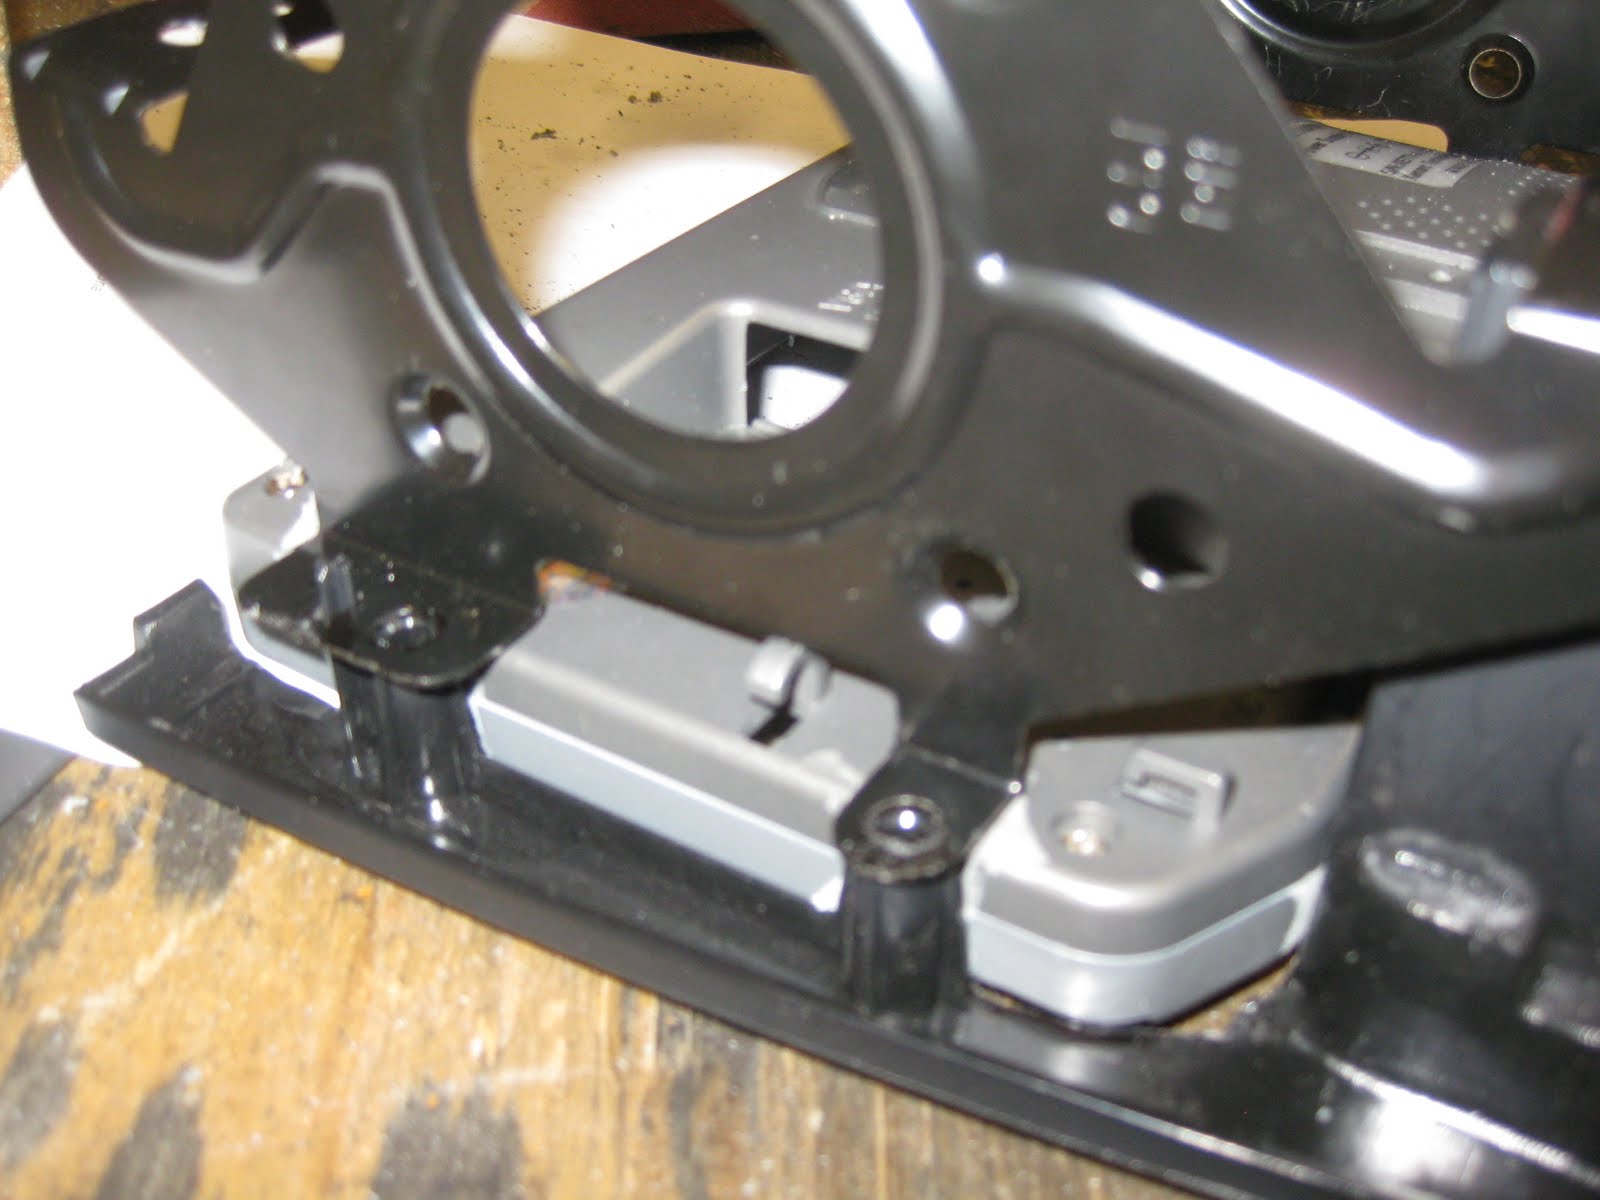
It was time to add the mounting hardware that secures the radio bezel into the dash.

I had to fire up the dremel again and remove some sections from the back cover but all in all, it was a great fit. The following two pictures shows the brackets fitting perfectly with the stock screw holes.


After test fitting everything I decided to throw the monitor in and make sure everything still fits. It was perfect. The only concern I noticed is that the power cables for the light that illuminates the lcd screen are exposed to the side. I will probably tape them in or cover them in hot glue to keep them protected and prevent any rubbing against the metal bracket.


Now that everything is fitted together and looks like it will work, i'll start on applying the filler and sanding and painting the unit. I should be able to complete that by the end of the weekend. :) I'll get another post up as soon as I can.

Tuesday, May 3, 2011

Just got everything working...

And the Asus AT5NM10-i died.

I'm not sure what happened exactly. One moment it was powered on, I unplugged a usb device, and the next everything shut off.

Through extensive testing :), I found the problem to be in the motherboard. There is a capacitor that is reaching temperatures hot enough to almost burn my finger, and this is within a few seconds of the board receiving power.

At first I thought it was the mount I was using, as there is a rivit near where the capacitor is located, but I bolted everything back up and checked clearance, there is over two milimeters of clearance.

So, in light of recent malfunctions, I decided to go with a different motherboard.

I will still be returning this one to get it replaced, as I'm certian I will not be able to get a refund, "purchased last December", and will find another use for it.

And now on to better news.

Behold, The replacement!!


I'll get a write up soon for how this board performs and how the over all system works.

On a side note,

The bluetooth module came it today. I will have pics and info up soon.

Monday, May 2, 2011

Carputer Installed

Finally,

After waiting for what felt like eternity,

My Carputer is installed!.
I purchased the M4-ATX from Amazon on Friday, over-nighted it so I could get it Saturday, and then started the install Sunday morning.

At first I didn't think it was going to be that hard. I mean, honestly, how hard could it be to place a computer into a car? I expected the mounting of the monitor was going to be the most challenging thing but to my surprise, that was by far the easiest part.

I started by hacking apart an old mini ATX case and using the metal from that as mount points for the motherboard, power supply, and monitor.

Originally, i expected to put the computer in the trunk somewhere, and maybe one day it will find it's way there, but as of now, i didn't have the extension cables I needed to run the monitor, so it is now located in the Dash.

I prefer the Dash location, but I have a feeling that as soon as I get my radio cover, I'm going to find that I have a lot less room.

Either way, we'll see when the time comes.

So for now, the car computer is installed, and it plays internet radio "Pandora", and mp3's :-)
I have a couple more orders from amazon that I'm waiting on and will update once they arrive.

Also, I will write a full write-up once I get some time.

Monday, March 28, 2011

Beer + Arduino = Remote Entry

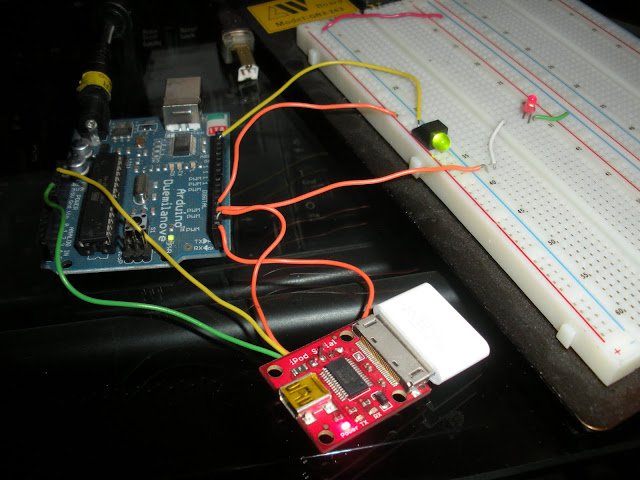
Well, all it took was three beers, a little bit of reading, and some testing to get my Nike+iPod set up as an iFob device for remote entry on my car.


I followed the tutorial over at Sparkfun and purchased an Arduino Duemilanove, a Nike+iPod device, a Serial to USB adapter, and a soldering Iron. The first step was to solder jumpers to the four ports on the Nike. Then i fired up the included *.PDE from the Sparkfun tutorial, set the unique id for my footpad, and powered everything on.

At first it appeared that nothing was working. The status lights that lit up on the Serial to USB connected where no longer firing, and the LED pins where not doing anything special. I of course called my programming friend over at this time and we took a look at it. After a lot of beer and many hours, neither of us could figure out why the two devices weren't talking.

Well, the other day I came across another tutorial on interfacing a serial device to the Arduino and noticed that they mentioned an interesting fact. The TX of the device was supposed to be connected to the TX on the Arduino.

Well, now that I have reset everything that we worked on while debugging the device. Re-uploaded the original PDE, and connected LED's to the pins that are supposed to lock/unlock the doors. I gave it a try. And success. It was just a matter of connecting the device up correctly. Another thing to note is that the status lights on the Serial to USB device will not light up for communications on the Serial port, just on the USB port. So, don't do like I did and use those as a troubleshooting tool.


From arduino

A short Video of it working.
From arduino

Next step, install into car.


Monday, February 21, 2011

Yay... working windows.

I have gone five years now without working windows. In 2007 I wired up some toggle switches to the motors themselves and had them sot of working, but it was a terrible setup and one day I finally grew frustrated and ripped them out. Now that I have focused my finances on my car, I decided the first thing I needed to fix was the windows. I knew that the power amp assembly had gone out and it was just a matter of replacing it.

I picked one up from Courtasy Nissan, for $90 shipped. Installed it and turned the key to the ignition spot and clicked the window button. Nothing happened. Of course i felt that moment of fear that maybe this was more than just the power amp assembly. Upon further investigation, i found that the fusable link that is up in the engine bay was burned out. Replaced that and it works! I had to stick a spring under the "auto-down" button as what ever kicks it back up was broken. On the passenger side if you pull up on the switch, the window rolls down, but you can't roll it up. At this point though, I don't really care.

Saturday, February 19, 2011

Clean seats... what a difference

I pulled my seats out and shampooed both the seats and the floor carpet. It took about 12hr's but the outcome was worth it. Below is a serious of before/after photos. Its been about two weeks and my car still smells amazing when I get into it. I plan to re-shampoo in a couple of weeks, to get rid of the layer that has now been pulled to the top.


Tuesday, February 15, 2011

The Interior

Current List of current missing/broken parts on the interior:

Missing center console cover. - I currently have the new one - need to mold it to fit to my screen. Should start working on it soon.
Stereo wire showing everywhere. - Still haven't resolved this
Shift boot tattered
Shift knob from Kragen - needs to be replaced
Holes in shifter area cover. - attempted to install switches, didn't work out.
Holes in door pieces. -
installed tweeters in wrong location. - Tweeters are now in their correct location, need to deal with old install holes.
Seats in terrible shape - Cleaned, they look great now
rear deck cover vibrates - fixed, the Rear top seat needed to be connected to the bottom seat.
steering wheel falling apart
Speedometer doesn't work - since 2003 - Indiglow gauges (terrible idea)

I plan to slowly replace or repair all the issues that I am currently having with the interior. Eventually I will start a couple of projects that should improve the overall appearance and functionality of my interior. I will post more information about them soon.